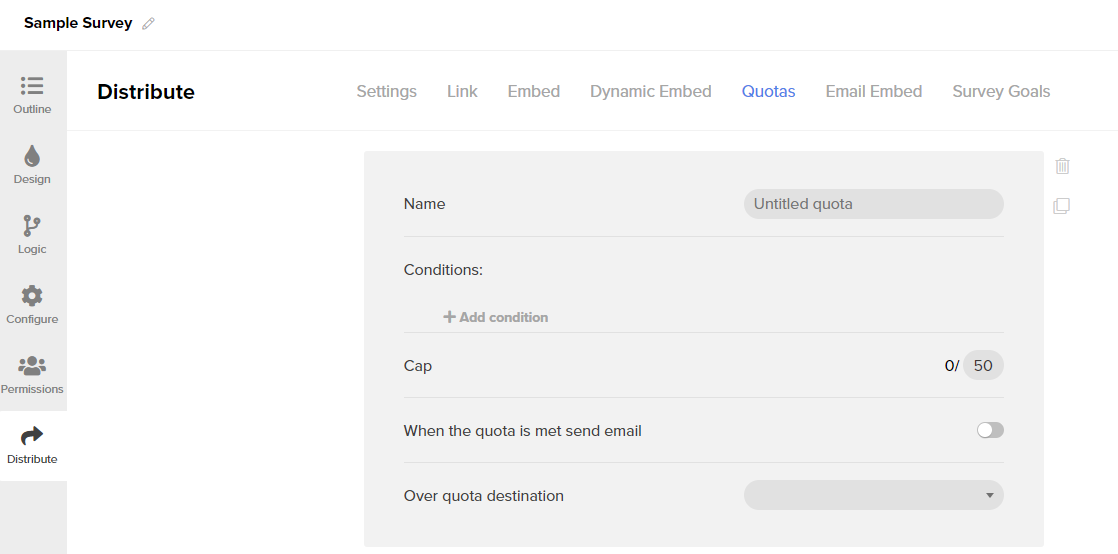
Manage and limit your survey distribution based on specific target requirements needed such as demographics, survey responses, or URL parameters.
💪 When to use it
- Apply quotas to your survey in order to avoid sample bias. When running a market research study, you will likely want to balance your respondent sample without needing to manually manage your incoming respondents. Use this function to decide if you want a user to continue answering your survey, based upon your selected data points and attributions.
🔨 How it works
- Go to the Survey Editor and click on Distribute.
- Click on the Quotas tab to add a new quota.
- Give your quota a name that will clearly inform you which quota group this correlates to.
- Determine the conditions for survey responses or URL parameters that must be entered in order to qualify for this quota.

Additional capabilities of quotas
- Cap the number of respondents you want to qualify based on the conditions you set.
- Automatically receive an email when this quota is reached.
Pro-tip: Use this to remain aware of your distribution status and to know when to adjust your fielding strategy or stop survey distribution.
- Send your user to a different destination within the survey (for example, the ending) if the quota has already been met.
- Duplicate the quotas via the ‘square’ button on the right.
Pro-tip: Use this function if you have quotas that follow a similar rule set.
- Delete a quota via the ‘trash’ button on the right.
- Add additional quotas via the ‘Add quota’ button at the bottom.
- Set up an over quota destination, if you do not want more respondents to qualify for the survey after the quota is reached. This feature allows you to send your disqualified respondents to a certain page on the survey.
Pro-tip: Leave this blank if you would like nothing to change once the quota is reached. To disqualify anyone who comes into your survey after the quota is reached, send the respondents to either a prize question at the end of the survey, or an ending page.
.png?height=120&name=300x300%20(1).png)