Within the Ending Page, there are three functions in your Toolbar.
- Settings: Redirect on ending
- Display: Image/video, Heading, Closing text, Link button, Survey post button, Bottom message, User Results Link, Share
- Preview: Desktop view or Mobile View
🔨 How it works
- In the top right corner of the ending pages are the following three sections mentioned above.
🏠 Where it lives
- In the top right corner of the welcome page.
Settings

Redirect on ending
💼 What it does: Automatically sends respondents to another URL when the respondent has reached the survey’s ending page.
Note: This is a Professional level feature. Please send us an email for pricing and more information.
🔨 How it works: Go to the relevant ending page and toggle on "Redirect on ending". When enabling this feature, you will be asked to fill out the following information:
-
-
- URL: Input the URL you would like to send respondents to.
- Delay (seconds): Define the amount of time, in seconds, the respondent is delayed before they are redirected to the URL. By default, this setting is set to 0.
- Pass URL parameters: An option to include the URL parameters of the survey to the redirected URL.
- Pass identifier parameter: An option to include an identifier parameter, which corresponds to the session ID of the respondent.
-
Display

💼 What it does
- Allows you to adjust the way a question or survey page displays in the Survey Editor.
Progress bar
🔨 How it works: The progress bar visually indicates the completion status of the survey by providing respondents with a clear and intuitive representation of how far they have progressed through the survey.
Image/video
🔨 How it works: Add images and videos to make it more visually appealing and grab the respondent's attention.
Pro-tip: If you included your brand's logo on the welcome page, placing it here can make the design feel consistent.

Self-hosted video
🔨 How it works: Incorporate any publicly available video hosted outside of YouTube to create a more customized and engaging experience for your survey respondents.
Video Settings
-
-
- Show Controls: Enable this if you want the respondent to have control over the video, including features such as play, pause, stop, and mute.
- Autoplay: Enable this option if you want the video to start playing automatically.
- Desktop max width: Modify the video width displayed on your ending page for optimal viewing on the desktop.
- Mobile max width: Modify the video width displayed on your ending page for optimal viewing on mobile devices.
-
Post-play settings:
-
-
- Redirect: Enable this option if you wish to redirect respondents to a specified URL once the video has finished playing.
- URL: Enter the URL to which you would like the respondents to be redirected.
- Pass URL parameters: An option to include the URL parameters of the survey to the redirected URL.
- Pass identifier parameter: An option to include an identifier parameter, which corresponds to the session ID of the respondent.
-
Heading
🔨 How it works: Start by thanking respondents for their time and participation. The heading text defaults to "Thank you!", but feel free to use a variation of this or something else. You can also further customize font colors and sizes in this field.
Closing text
🔨 How it works: In a few sentences, thank respondents, encourage them to share the survey (if appropriate), and set expectations for follow-up (correspondence, delivery of prizes, etc.). You can also further customize font colors and sizes in this field.
Link button
🔨 How it works: Add a button that links to an external URL, such as your brand's website.
Survey post button
💼 What it does: Enables you to push data from your survey’s questions and answers to a target URL link of your choice in a synchronous mode, using the POST request method. To push the data from your survey to a subsequent URL, the first step is to label relevant questions and answer choices of the survey for which you would like corresponding data to be passed to the target URL.
🔨 How it works: To label the elements, navigate to the Configure tab inside the Survey Editor and click on the Labels tab. Here is where you will label the questions and answers contained in your survey.
Note: The labels applied here will determine how the data is labeled when received by the target URL. It's best to choose labels that will easily help you recognize the data that has been collected and passed outside of Segmanta’s platform and be usable for the end-user as well.
Next, you will need to assign a target URL to the Survey Post button. To do so, navigate to the survey’s ending page and follow the steps below:
-
- Click on the Settings.
- Toggle on the Survey Post button and click it to trigger its options setting, where you can configure the caption and the target URL that you would like to send the data.
Note: The target URL must be HTTPS to enforce encryption of potentially sensitive data, and the editor will not save without it.
-
- Once a respondent clicks on the Survey Post button on your survey’s ending page, data from the labeled questions and answers will be sent to the target URL via the POST method.
Note: The data will be sent only if a user clicks on the Survey Post button. Should a user reach the ending page and decide to not click on the button, the data will not be POSTED to the target URL.
Data Structure: The receiving page receives a group of POST variables that look like the following (formatted as JSON):
{
    "{{question_label_1}}": "{{answer_1}}",
    "{{question_label_2}}": "{{answer_2}}",
    "{{question_label_3}}": "{{answer_3}}",
    "sppp": {
        "{{question_label_1}}": "{{answer_1}}",
        "{{question_label_2}}": "{{answer_2}}",
        "{{question_label_3}}": "{{answer_3}}",
    }
}
Note: In the payload, there is a reserved parameter “sppp”, which is a special accessor where all posted data can be accessed.
Bottom message
💼 What it does: Messaging that goes below the link button.
User Results Link
🔨 How it works: When enabled, it adds a button that allows the survey respondent to view their own survey results.
Share
💪 When to use it: Add social media share links to encourage the organic distribution of your survey. Respondents are most likely to share a survey when it is fun to take or offers an incentive.
Preview
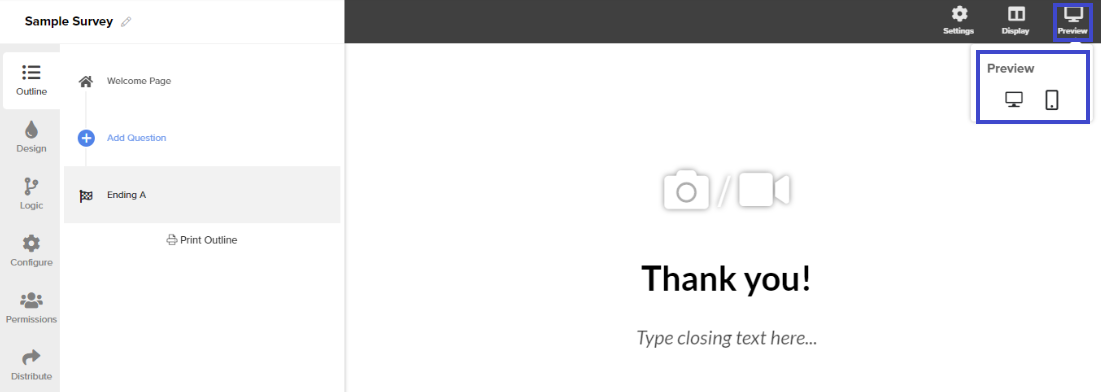
💪 When to use it
- Test the survey on different devices without recording responses and affecting the results in the Analytics Dashboard.
- This built-in preview is designed to give you a general idea of how the survey will display on mobile and desktop.
- The preview will appear for whichever page or question you are currently viewing.