Within the Welcome Page, there are two functions in your Toolbar.
1. Display: Image/Video, Heading, Intro Text, Footnote, Checkbox
2. Preview: Desktop view or Mobile View
Display
💼 What it does
- Allows you to adjust the way a question or survey page displays in the Survey Editor.
🏠 Where it lives
- In the top right corner of the welcome page.

🔨 How it works
In the drop-down menu, you can add or remove the following:Progress bar
👀 How it looks: Located at the upper-middle center of your survey, this progress bar visually indicates the completion status of the survey.
Image/Video
👀 How it looks: Choose how you would like to position the image/video as above or under the page title. You also can add a subtitle underneath.
🔨 How it works: Upload a file saved on your computer or provide an image URL (web link).To add a video, provide a YouTube link. If your video is not yet on YouTube, you can upload it as “unlisted” so it can play within your survey without being discoverable in YouTube searches.
💪 When to use it: This is often a good place for your brand's logo, which displays best if it is small and has a transparent background. Avoid using large or vertical images as they may push the text lower on the page and lead to scrolling.
Pro-tip: Wide, banner style images display best (800w x 350h). However, you can upload an image with any aspect ratio and the image area will expand accordingly.
Heading
👀 How it looks: This is the main survey title. It can either be inserted here or on the top left corner of your survey. You can customize font colors and sizes in this field.
Intro text
👀 How it looks: This is a subtitle that goes underneath your heading. In 2-3 sentences, let respondents know what to expect: why they should answer your survey and how long it should take. You can also customize font colors and sizes in this field.
Footnote
👀 How it looks: This is text that appears to respondents at the bottom of the welcome page.
Pro-tip: We recommend using this space to share with respondents how their data will be used and what they are agreeing to share by agreeing to take the survey. We recommend following it with a checkbox, where respondents can click “Agree”.
Checkbox
Pro-tip: The Checkbox function is most often used when running a competition.
Additionally, you can include a Start button on your welcome page. This button is editable so you can update it based on your desired phrasing.
Preview
🏠 Where it lives
- In the top right corner of the welcome page.
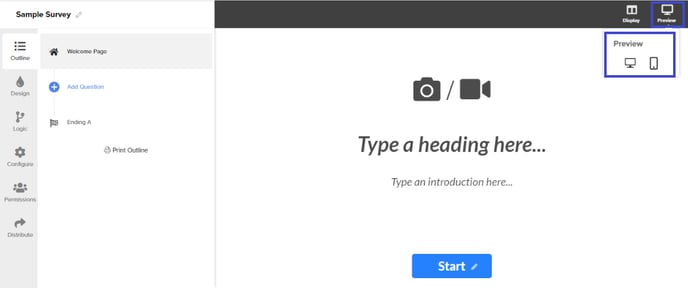
💪 When to use it
- Test the survey on different devices without recording responses and affecting the results in the Analytics Dashboard. This built-in preview is designed to give you a general idea of how the survey will display on mobile and desktop. The preview will appear for whichever page or question you are currently viewing.