💡 This article covers
- How to change a base language
- How to add a language
- How to translate a language manually
- How to distribute your survey in your chosen language(s)
💪 When to use it
- Add additional languages to a survey to expand your respondent range to collect more data and knowledge about consumers with diverse backgrounds.
Changing a base language
By default, all surveys are created in English. Therefore, all surveys created from scratch start with their base language in English, unless you choose to switch it to your native language or any other language you choose.
Updating the base language will change the following:
- Survey’s messaging to your selected language: Translations can be done for base languages, and you have the ability to override them.
- In the case of right-to-left languages, it will switch the Survey Editor (and survey appearance) to right-to-left.
Note: You will need to provide your own translations for the rest of the survey text.
🔨 How it works
- Go to the Survey Editor and click on Configure.
- Navigate to the Languages tab on the top toolbar.
- Click on the Base Language drop-down menu to view the list of languages and select your desired language choice.
- Select Edit Messaging to view or edit the messaging in the local language.
Adding a language
🔨 How it works
- Within the Configure tab of the Survey Editor, select Languages.
- Click “Add a language” to view the drop-down menu for supported languages and select your desired language.
Note: The Analytics Dashboard will remain displayed in your selected default language, except for open-ended questions, which will be displayed in the language the respondent submitted their response in.
Translating a language via override
🔨 How it works
- If your desired language is not available, select the Messages tab from the top toolbar to customize your messaging to any language or wording.
- Once you have added a language, mouse over to the right side of the box and click on the edit icon to add your translation into Survey Messaging.
Note: For each language added, generic default messaging will be automatically translated to the selected language. However, you will need to provide your own translations for the survey content.
- After clicking on the edit icon, you will see two tabs: Outline and Messaging. Within these tabs, view all of your survey’s content displayed on the left column, with correlating text fields in the column on the right. Manually input the translation of the content that you see on the left, in the correlating field in the right column.
Note: If a translation field (the right column) remains empty, the text from the base language (the left column) will fall back to the survey's default language.
Note: Segmanta supports right-to-left languages. After selecting a right-to-left language from the language dropdown menu, your survey will automatically swap to accommodate for right-to-left formatting requirements.
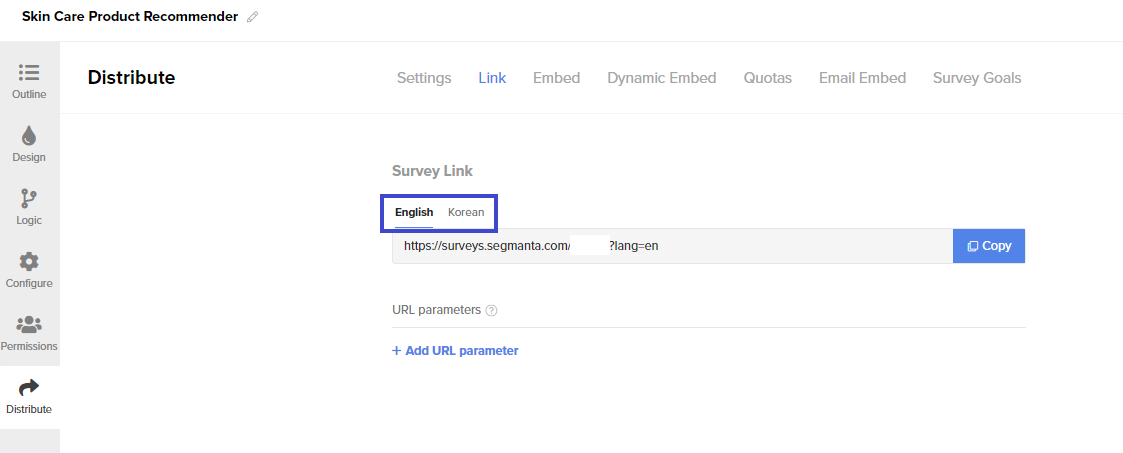
Distributing your survey in your chosen language(s)
Once you’ve successfully created a multi-language survey, it’s now time to distribute it in your chosen language(s).
To do so, you will now be shown two or more links, depending on how many languages you have chosen to translate your survey into. These links take you to:
- The survey in its Base Language
- The survey in the additional language(s) chosen
🏠 Where it lives
- Go to the Survey Editor and click on Distribute. Navigate to the Link tab.
🔨 How it works
- Click Copy to distribute your survey in the additional languages(s) you have chosen.